Anthurium Hookeri, a bird’s nest type of anthurium, might have caught your attention already if you love aroids like me.
Is it the big, wrinkly green leaves of this tropical plant? The jungle effect that it creates in an instant? Or is it rareness that appeals to you?
Below, you will find all the information you will need to understand whether you have a true hookeri or a hybrid and how to grow it properly to make sure it stays happy for a long time.
Anthurium Hookeri – Basics to Know
Anthurium hookeri is one of the most popular bird’s nest anthurium plants currently in cultivation.
But, there’s a twist: the hookeri plant you might find at your local nursery or even own is probably not a true hookeri.
Instead, it’s likely an unidentified hybrid. Many nurseries mistakenly label any bird’s nest type plant under the name Anthurium hookeri.
So, how do you know if you have the true anthurium hookeri plant?
To check if you have a true Anthurium hookeri species, look at the following characteristics:
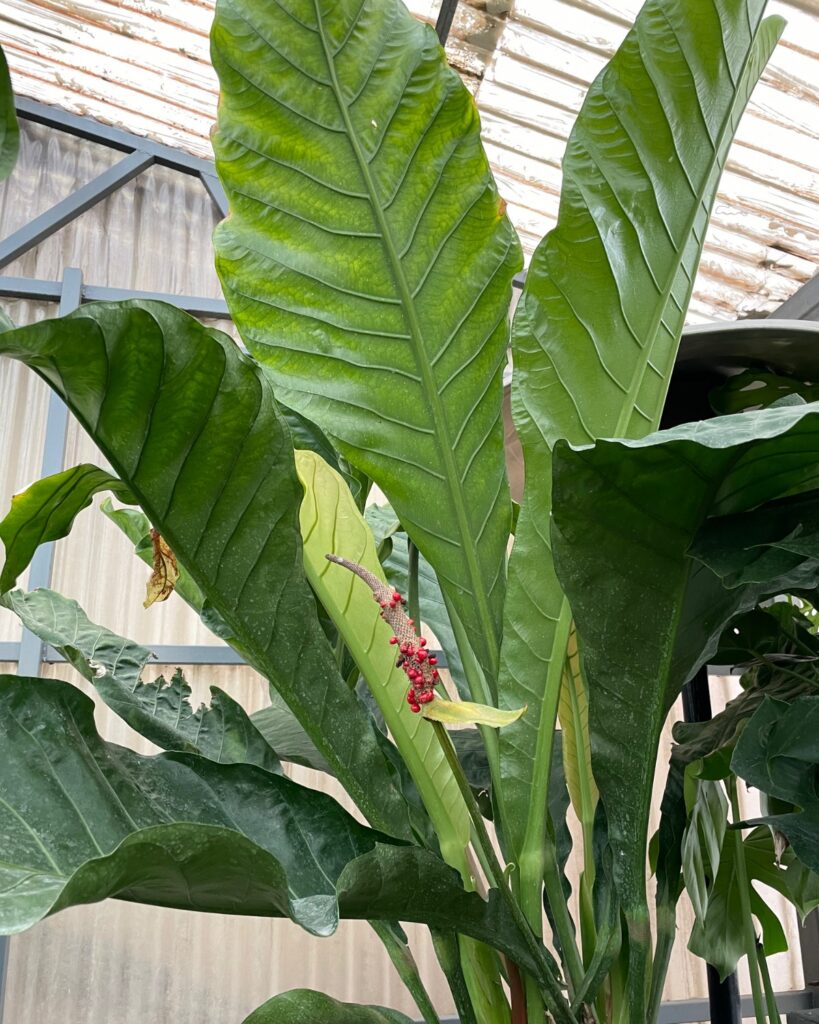
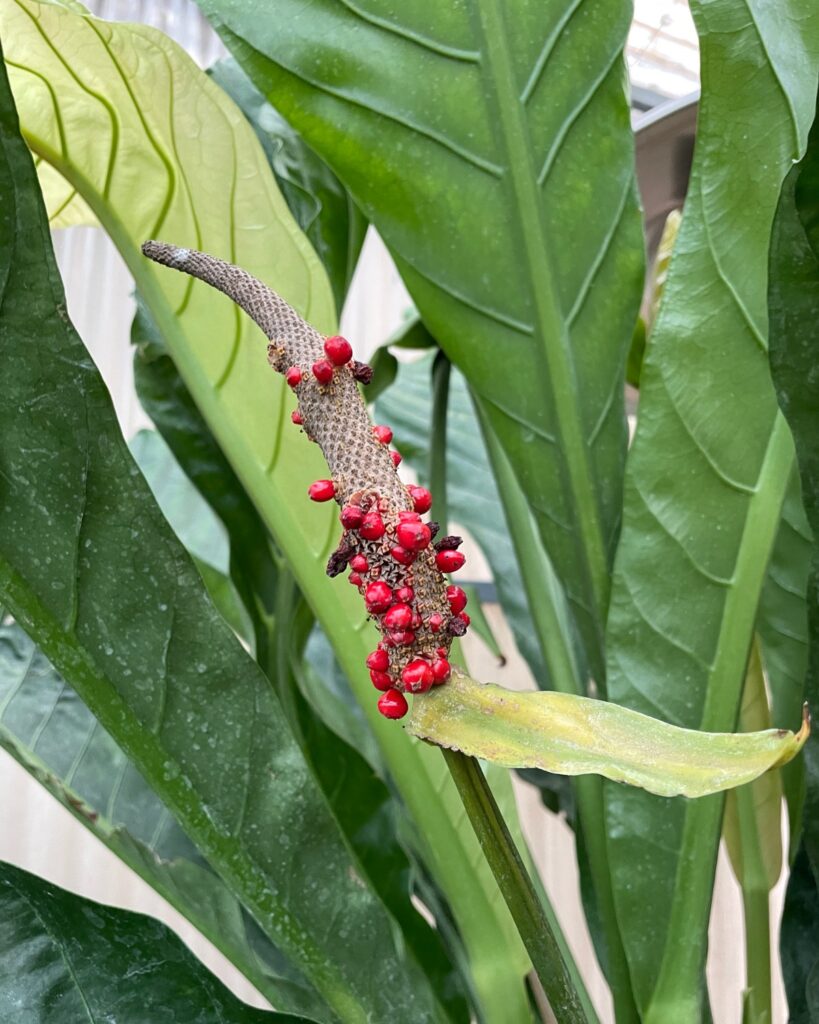
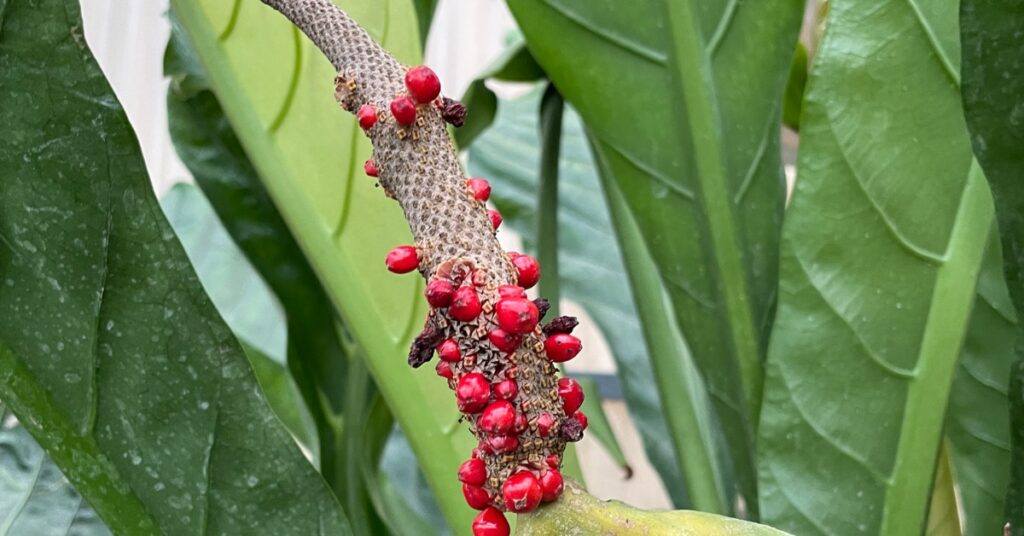
- The berries of the true Anthurium hookeri plant are white, not red!
- Small glandular spots can be found beneath the leaf, distinguishing Anthurium hookeri from other bird’s nest anthuriums.
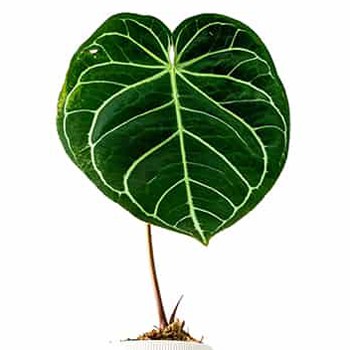
- Unlike other species, the true Anthurium hookeri’s leaves don’t have ruffled edges.
- Its young leaves have a unique rolled appearance where one edge overlaps the other.
Recognized for its unique growth pattern, Anthurium hookeri is one of the most distinctive types of bird’s nest anthurium.
The leaves of Anthurium hookeri are broadest near the tip and can reach about 3 feet in length. This rare tropical plant belongs to the Araceae family and is native to Panama’s tropical forests.
It is an epiphyte, meaning it doesn’t need soil to grow- it grows on top of other plants.
Anthurium hookeri is distinct from other bird’s nest anthurium types. While most belong to the Pachyneurium section, Anthurium hookeri is classified under the Porphyrochitonium section.
Anthurium hookeri relies heavily on catching fine litterfall, such as leaves, twigs, and flower parts. This contrasts with typical mat-forming epiphytes that retain only minimal amounts of intercepted fine litterfall.
Even though you’ll see bird’s nest anthurium types labeled as hookeri in your local plant shop, it’s not as popular as you might think.
Generally, velvet leaf anthurium or strap leaf anthurium types end up in aroid enthusiasts’ collections first. And, the bird’s nest types of anthurium, like Anthurium hookeri, can grow to large size and take up quite a bit of space.
I encourage you to try growing a bird’s nest anthurium like anthurium hookeri for a change. It will add a different structural interest to your indoor jungle.
Even if it is not a true species.
I don’t personally own an authentic Anthurium hookeri species. While it’s rare and hard to come by, I haven’t actively sought it out.
Now, let’s discuss Anthurium hookeri care requirements.
Lighting & Placement
Considering its natural habitat, the Anthurium hookeri loves bright indirect sunlight. It doesn’t do well under direct sunlight, though, because the leaves can get easily scorched.
If you decide to grow it, make sure you find a good spot near a window that will have at least 6-8 hours of sun exposure. Because the leaves tend to get big, they will photosynthesize for quite some time.
You will know that the lighting is adequate for the plant when you see the inflorescences forming. You can also try artificial lighting if you think your space isn’t too bright overall; just make sure that the leaves don’t get burned, and adjust the levels when necessary.
Read next: Anthurium Light Requirements: All You Need to Know
Watering
Anthurium hookeri prefers moist and well-drained potting mix overall. Most people try to follow a regime of watering the plant every 7 to 10 days.
For best results, in between each watering, try checking if the potting soil is moist or slightly dry. If it is moist, leave the plant as it is. If it feels dry, then it is time to water it.
The watering should be thorough – don’t just give it a quick go. Let the water drain a few times from the bottom of the pot. This keeps the root ball moisture intact and the leaves perfectly hydrated.
Remember that in between the seasons, the plant will require different amounts of water.
During summer and spring, you might have to water it more often. During the winter, you won’t have to water it a lot, given the temperature drop and lower light levels.
This applies if you grow the plant at ambient temperature outside the grow lights.
Read next: Water Like a Pro: An Essential Guide to Anthurium Watering
Soil & Potting
A well-draining soil will do wonders for the Anthurium hookeri growth. Because the plant is susceptible to root rot, you can use coconut coir and an orchid mix in a 1:1 ratio.
I wouldn’t recommend you use a general-purpose soil mix because it tends to get clogged and compact. You can check out my ideal anthurium potting mix in this blog.
For epiphytic plants I use extra chunky mix with large pieces the roots can attach themselves to.
Just like Monsteras, Anthuriums enjoy some acidity in the soil. Using a pine bark in your mix will do wonders.
Read next: Ultimate Guide to Anthurium Soil: What to Put in Your Potting Mix
Temperature & Humidity
Considering the natural habitat of the Hookeri, the ideal temperature is always warm. Try to keep temperatures relatively stable in between 70ºF (21ºC) – 90ºF (32ºC).
Anything below or above these temperatures can cause an issue. The leaves can get droopy or even wrinkly if they detect a change in their environment. If you have air-conditioning or heaters, try to keep the plant away.
When it comes to humidity, you will need to keep it relatively high- close to 50%- because we are trying to mimic its natural habitat. 60%-70% is the ideal percentage, and you can achieve this with a humidifier.
In case you don’t have one, don’t worry! You can increase the humidity by grouping your Anthurium along with other plants. The plants will create their microclimate using transpiration.
Fertilizer
You will find many fertilizers in the market, but I have found that the NPK 20-20-20 fertilizer is the best (N= nitrogen, P= phosphorus, K= potassium). The leaves get stronger, vibrant, and the roots get established.
The 10-10-10 ratio is also quite powerful. Always read the instructions on the label, because you run the risk of seriously burning the plant. For stellar results, apply the fertilizer while the soil is still moist. This will ensure equal distribution of the nutrients.
Growth rate & repotting needs
The growth rate of the Anthurium hookeri is overall steady. Once you notice roots coming out of the pot bottom, it’s time to repot it. The spring and the summer is the most ideal time for repotting if you live in a place with four seasons.
Don’t let the big leaves fool you here – check the root ball. The leaves can trick you into selecting a bigger pot accidentally. Select a pot a bit larger than the one you have now and you will be alright.
I have also discovered that the hookeri likes to feel a little root-bound.
Here are some steps to help you achieve a successful repotting:
● Check the root ball. A pot that is a little bigger than the one you got now is great!
● Remove the plant from the current pot; try not to disturb the roots.
● Get the new potting mix ready! If you’ve used coconut coir first, try to mix it up a little bit but add more pine bark and perlite. Don’t overthink the ratios too much; if you are using the right type of soil mix as we discussed above you will be okay.
● Before you dip the plant into the fresh soil, take some time to check the roots. You might have to loosen up the soil with your fingers. Try being gentle and don’t rush- repotting for all plants is a stressful process.
● Place the plant into the new soil and pot. Make sure you press the soil firmly towards the bottom. Continue pressing the soil until you reach the top. We don’t need any air pockets!
● Water thoroughly, and let the water drain a few times out of the pot bottom.
Read next: The Ultimate Guide to Repotting Anthuriums: When & How to Repot
Common problems
Just like all plants, Anthurium hookeri can become quite sensitive to pests and diseases. Below, we will discuss the most common ones you might come across:
Diseases
● Root rot is the most common fungal disease you’ll come across. This can happen mostly because of overwatering or poor-drained soil. The roots become brown/black and quite mushy.
You will also notice a strong foul smell. To solve this fast, you will have to remove the plant from the pot and check the roots thoroughly with your hands. If you notice any mushy roots, you can cut them off using a sterilized pair of scissors.
Don’t forget to use fresh soil when you repot the plant.
● Anthracnose is the second fungal disease you might spot on your Anthurium hookeri. The tell-tale sign is the black spots on the stems, leaves, and even on the flowers.
You will have to cut all the infected parts using a pair of scissors. Since this fungus loves humid conditions, avoid wetting the leaves when you are watering.
Keep it simple and water only the soil carefully. To make sure it goes away once and for all, you will have to purchase a copper-based fungicide (you can find it at the local plant nursery).
● Leaf spot is another common fungal disease. You will notice tiny black or brown spots on the leaves and the stems. You will have to cut all the infected areas and use an all-purpose fungicide to get rid of it.
Read next: Anthurium Diseases: Your Guide to Identification and Treatment
Pests
● Aphids are common pests on the Anthuriums. You can usually find them below the leaf surface, trying to eat the plant’s sap.
To keep them away, ensure you shower your Anthurium occasionally using strong water pressure. As an extra prevention, use neem oil!
Once you spray it on the plant, it gives a bitter taste to the leaves. The pests don’t enjoy it at all!
● Mealybugs are another common visitor and the most persistent I might add. They like to eat the sap as well, and the leaves will become yellow, too.
Regular showering of the plant will keep them at bay! They hate neem oil, too, so use it as often as you can.
● Spider mites are also very common pests. You will notice webbing and yellowing. Follow the same steps described with aphids and mealybugs above. The plant won’t need much time to recover if you catch them early on.
Read next: 6 Most Common Anthurium Pests (and How to Deal With Them)
Anthurium Hookeri Propagation
You can propagate the Anthurium hookeri using a stem cutting, or by purchasing seeds.
● If you want to use a cutting, make sure you cut a healthy stem. You will need to have at least two to three nodes on it.
Once you are done, plant it into sphagnum moss for it to root. You can also try perlite or water propagation.
If you want to increase the odds of successful propagation, you can dip the cutting into a few drops of rooting hormone.
● If you are using seeds, place them on top of moist sphagnum moss and cover the container. Place it under grow lights or a sunny place and enjoy observing the tiny roots starting to grow. Fresh seeds will take up to 3 weeks to sprout.
Don’t rush with repotting the seedlings from sphagnum moss. They’re very fragile and can easily snap!
That’s a wrap! I hope you found this guide to Anthurium hookeri care helpful.